Baofeng BF666
From what I had read, it appeared that the Baofeng BF888s was a popular radio to use for a simple node radio, it's inexpensive to buy, delivers pretty good audio, quite easy to modify for an Allstar node and can be programmed easily using the free Chirp software.
Why Is Mine Different
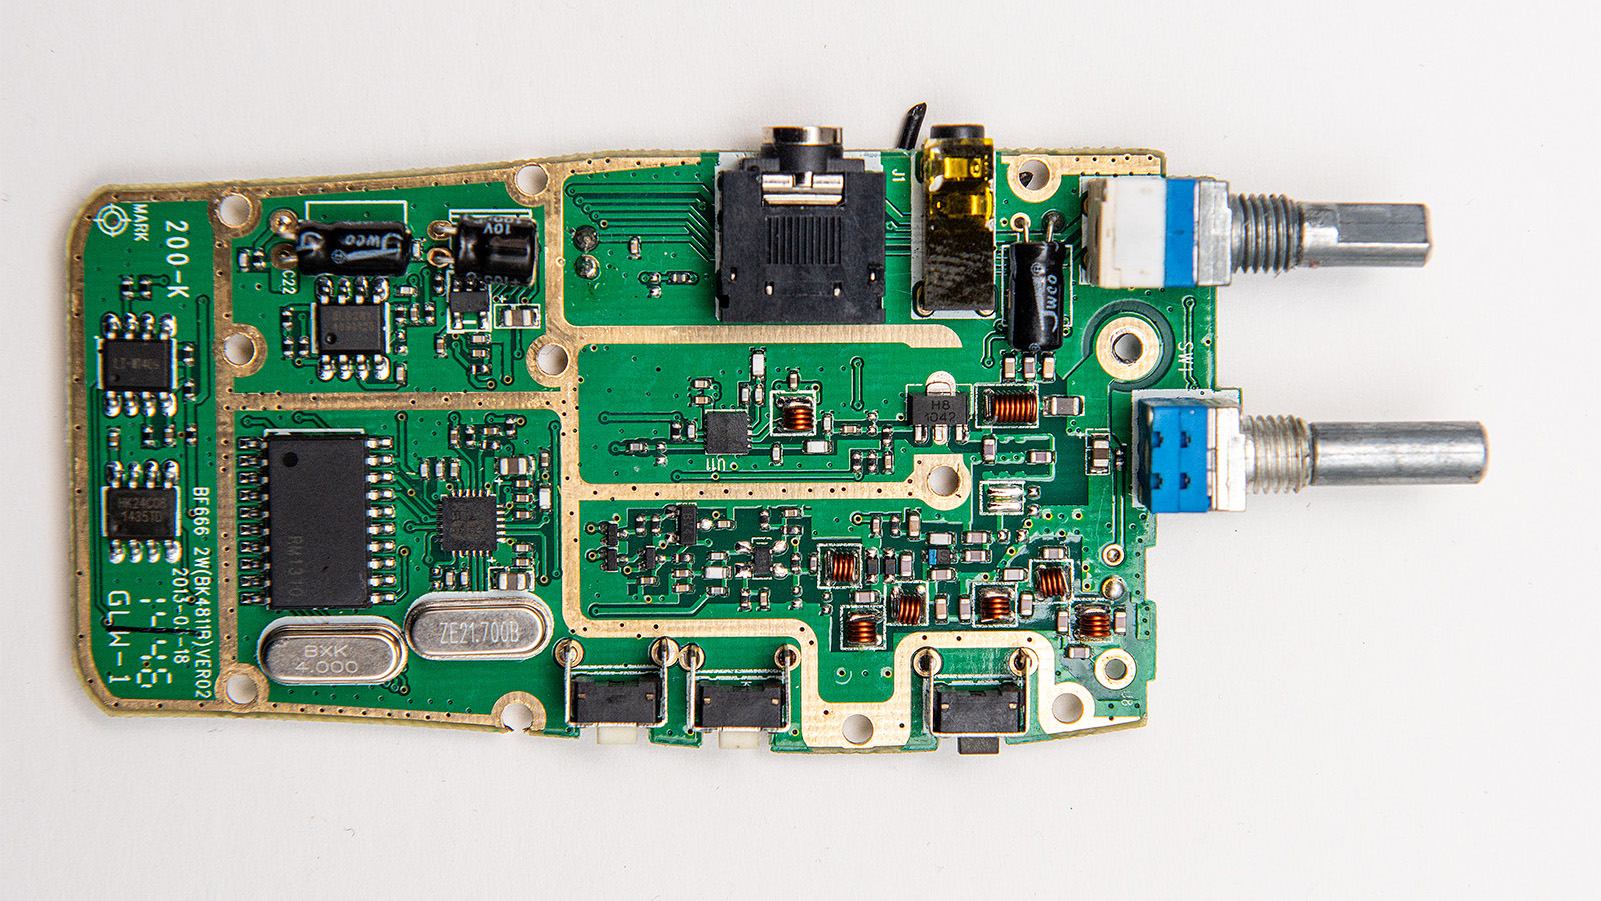
After opening mine up, I noticed that the main PCB was longer than those in all the other images of the Baofeng BF888 I had seen. Upon closer inspection, I spotted the letters 'BF666' on the PCB. Under the battery, attached to the metal chassis, there was a sticker that read 'Model: BF888s', so I’m unsure why it has a BF666 PCB inside.

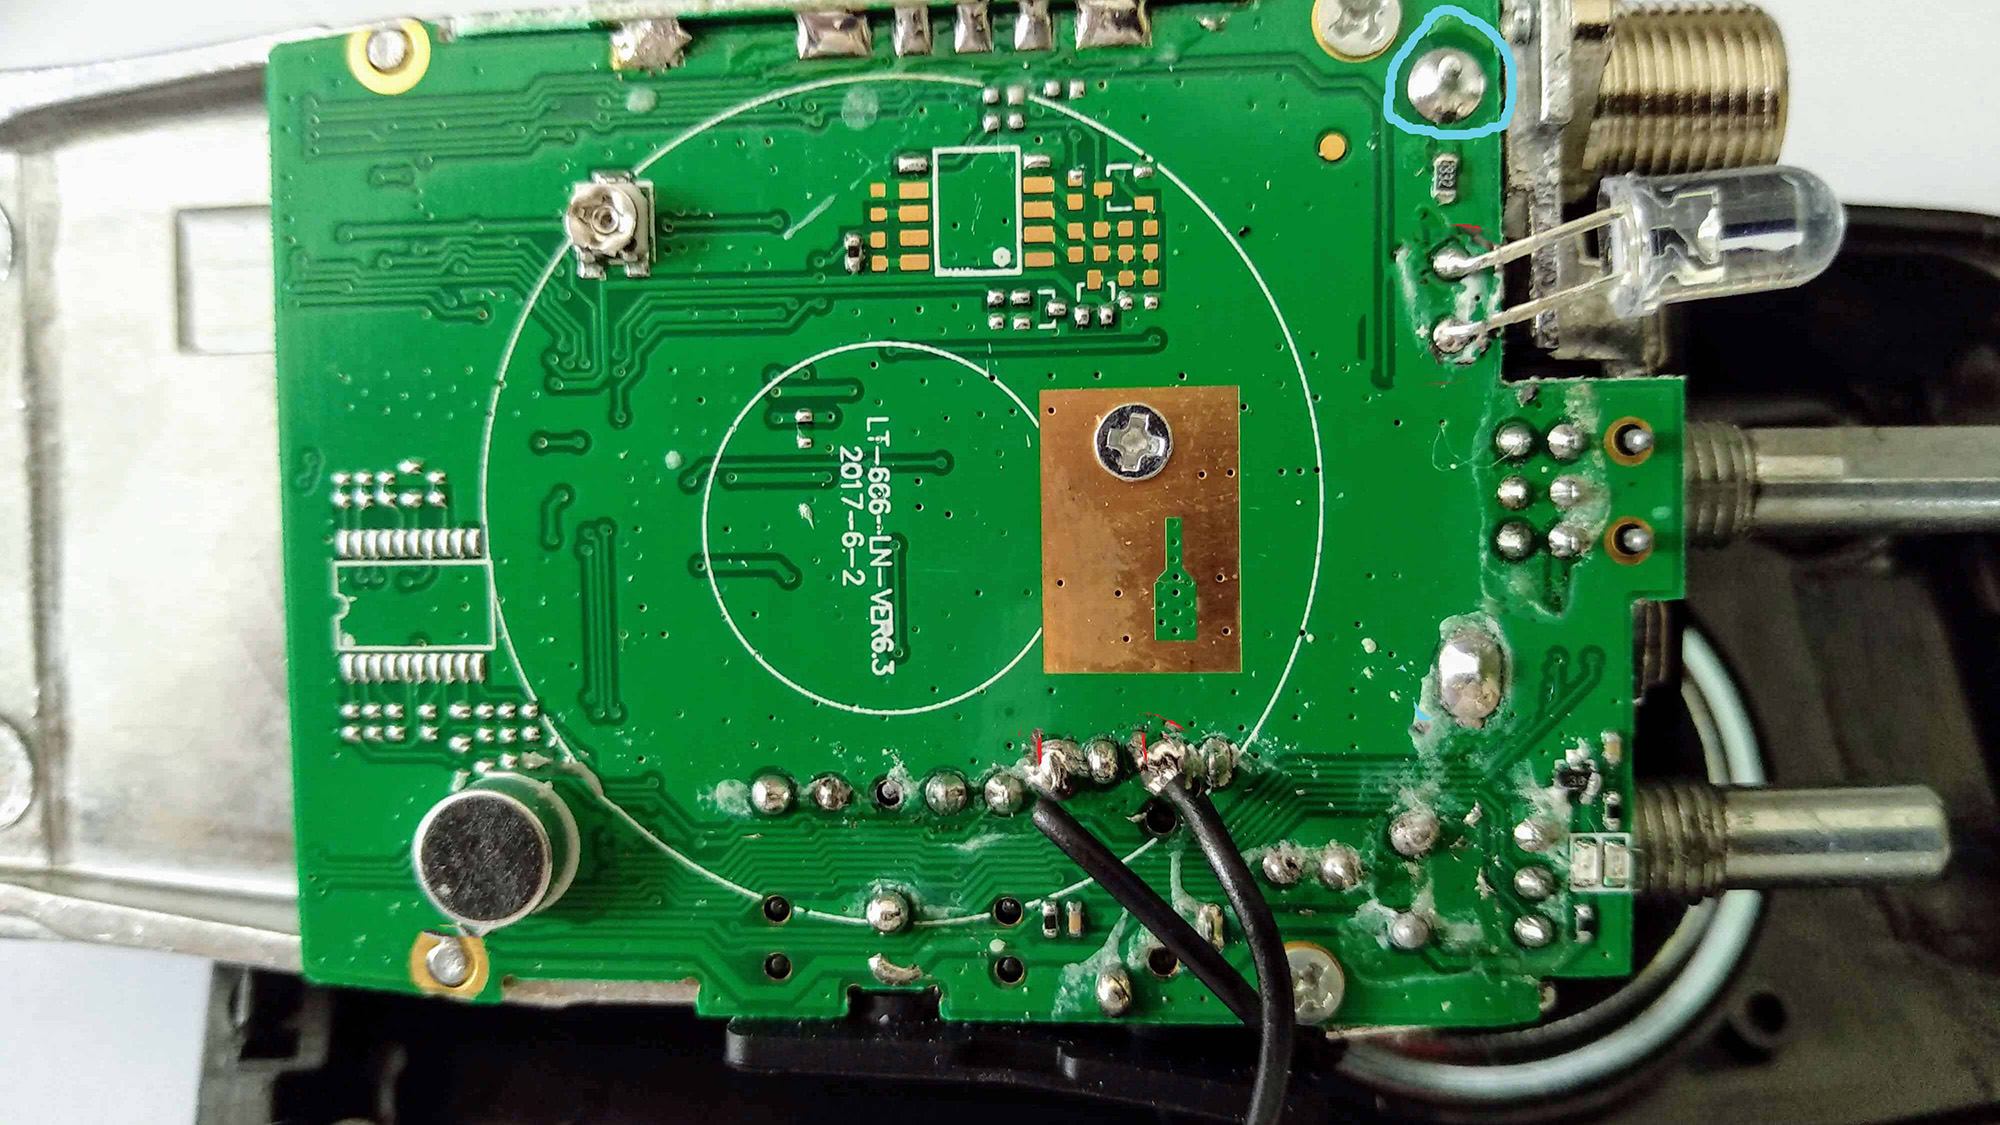
Turning the PCB over reveals the reason for the board’s increased length. At the bottom, there are two additional ICs.
The rest of the PCB layout appeared quite similar to the BF888, so I decided to proceed with the modification.
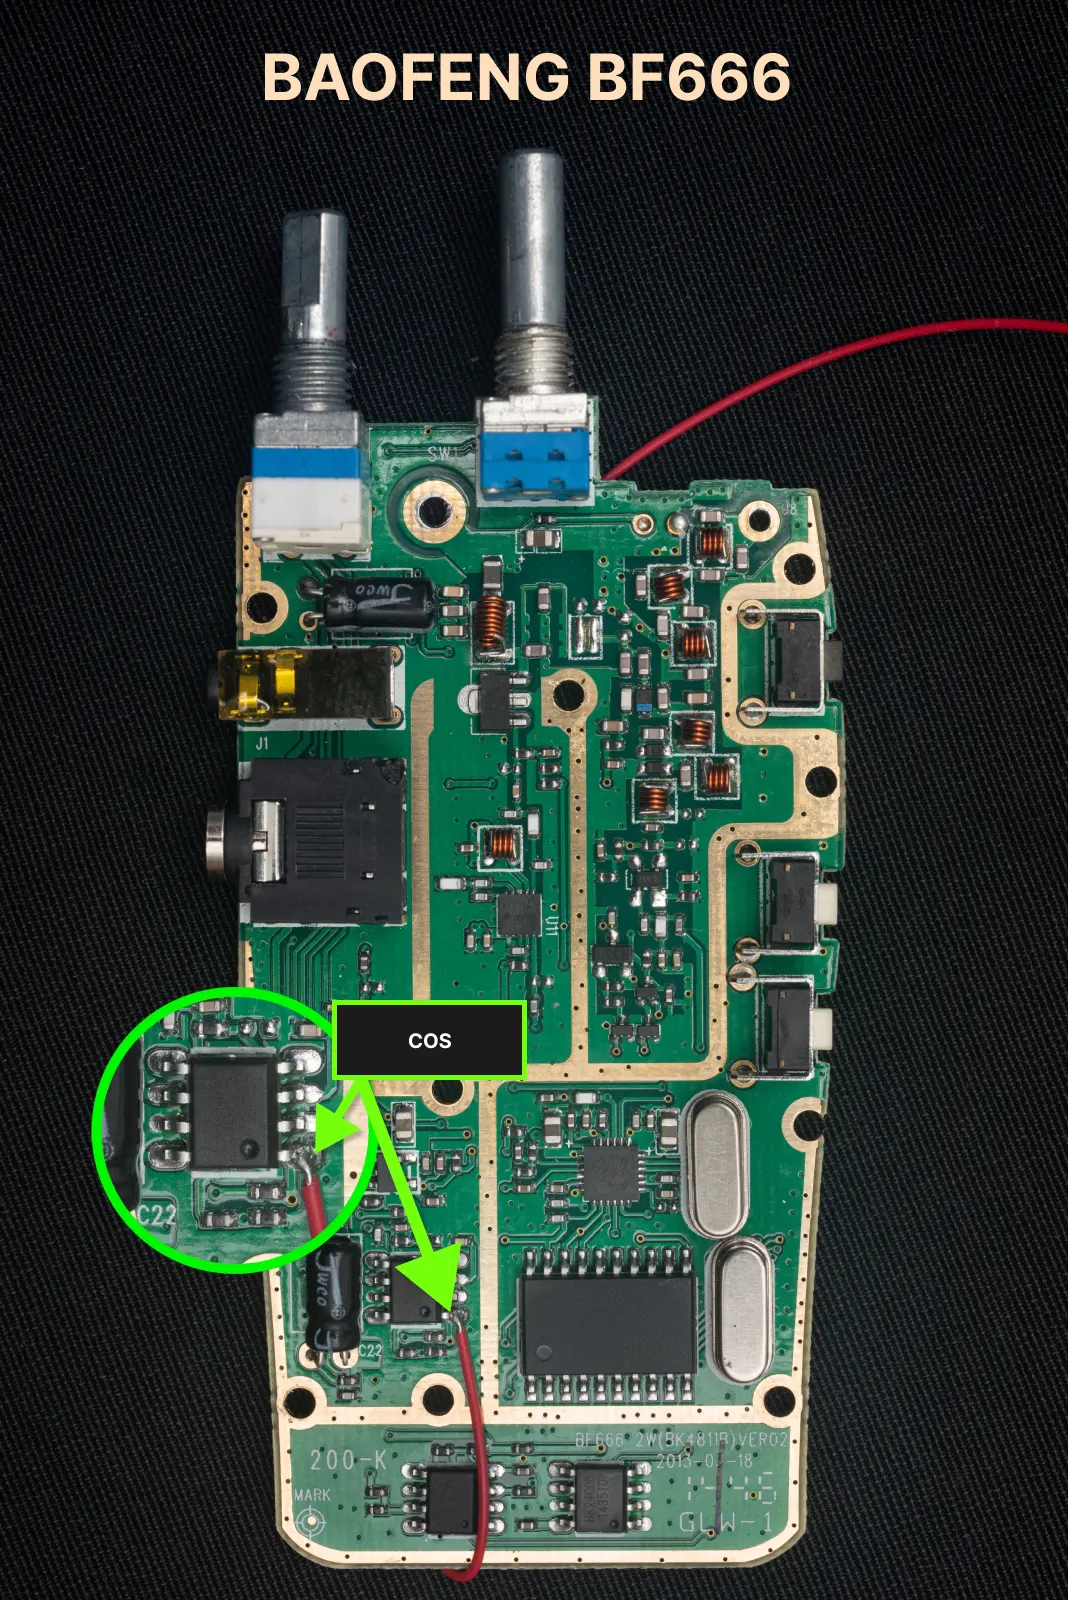
COS Wiring
After studying images of actual BF888 boards, I located the IC for the COS wiring by matching the information stamped on the top of the IC.
I then attached a length of 30 SWG wire to pin 1 of the IC, which would be used for the Carrier Operated Squelch (COS).
BF666 Internal Wiring
The internal wiring for the Baofeng BF666 turned out to math that of the Baofeng BF88 despite the 666 having a different printed curcuit board.
Click to see larger view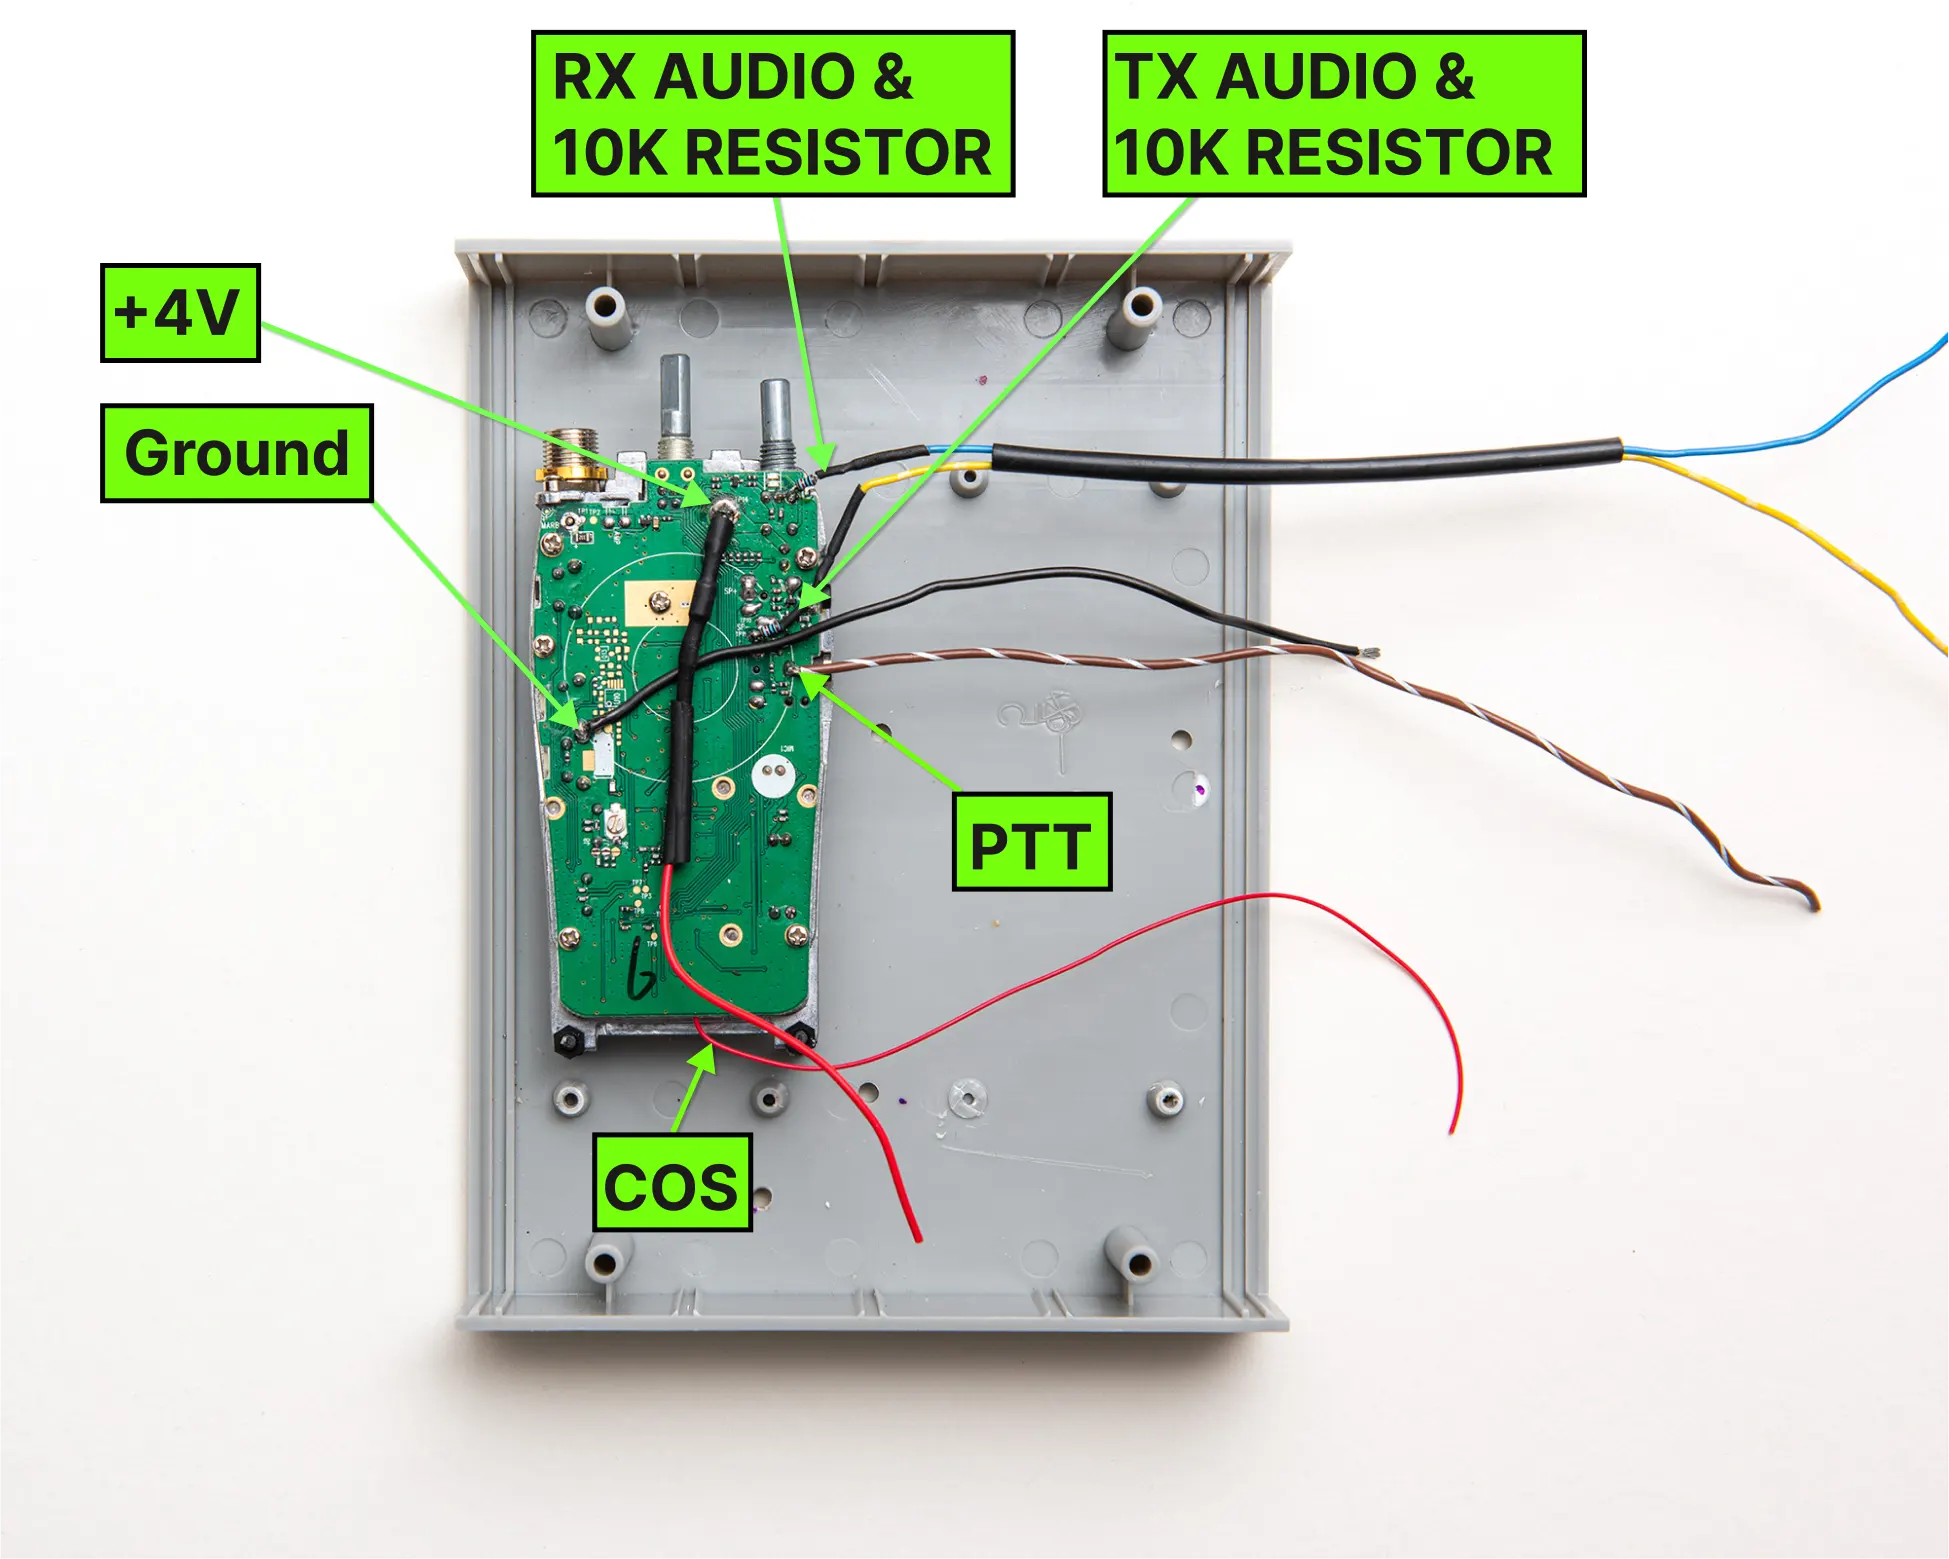
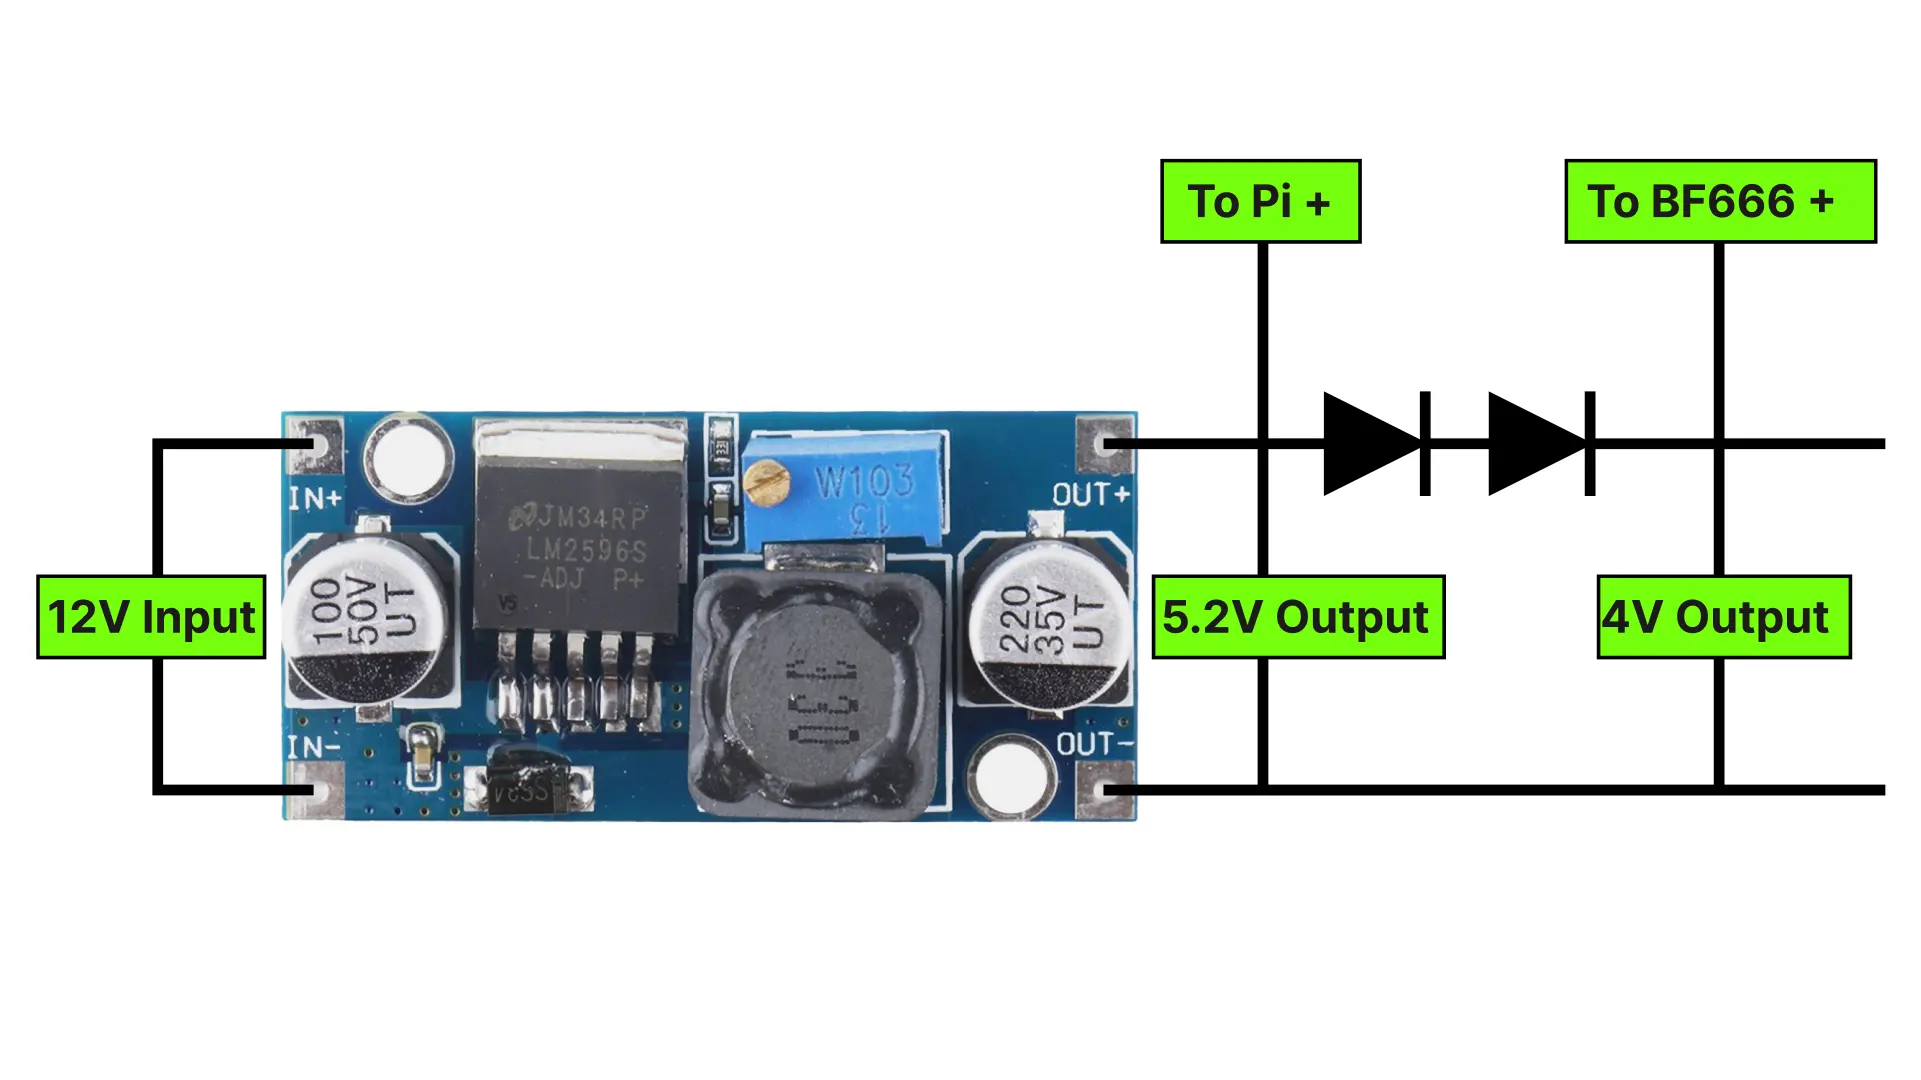
LM2596 Buck Converter
To power both the Raspberry Pi and the Baofeng BF666, I used a single LM2596 buck converter, which is very affordable.
I supplied 12V to the input and then adjusted the small screw until I obtained +5.2V at the output, which I used to power the Raspberry Pi.
o power the Baofeng BF666 radio, I used two diodes to drop the voltage further to around 4V.
Click to see larger view